Mobile POS: Documentation of Sales ERP App
M-POS is a Sales ERP App. This documentation for the Mobile Point-of-Sale (M-POS) Android application, is a part of Sales ERP Software.
Prerequisite
- Android Smartphone (Version = 5 or more)
- Sales ERP Online version installed in a web server.
- Purchase key (which you use to install web version).
- The App (Play Store link)
How to download
-
Login to your Sales ERP web application, go to Add-ons module.
-
Now click on “buy now “ button of Android App. You should redirect to secure.bdtask.com
-
If you have no previous account in secure.bdtask.com, you can make a new one.
-
After complete all the purchase options you will get a Purchase key.
-
Now use this purchase key to download the app. The app will download to your server. You also need this key for app connection.
-
Now click on the download button, a QR code will show. You will get a download link by scanning the QR code. Use this link to download the app
Setup: Connect Your App
Steps
- After Installation, you should see this page.
- Insert the Purchase Key.
- Go to Setting > App setting in web. Copy your site URL and paste it into the Online server field. (make sure “/” is at the end of the URL) Then click Generate QR.
- Now Scan the Middle QR code. by your phone
- Click Verify.
- iF Everything is okay, the login page should show
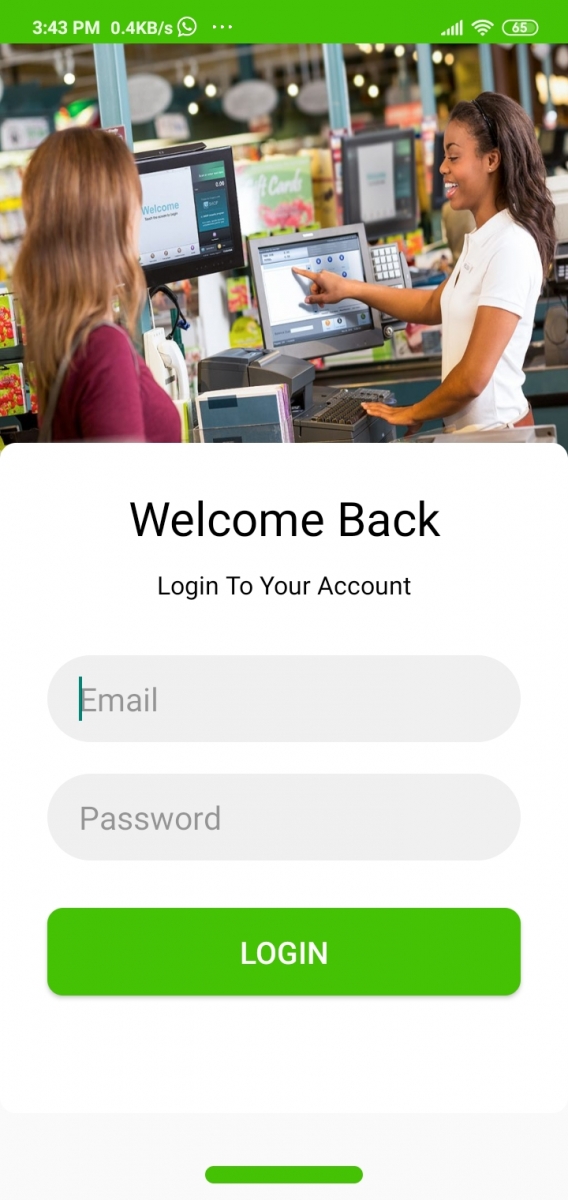
Login to Your App
You can use the same login credential to log in to your app. You can also add a new user from the web.
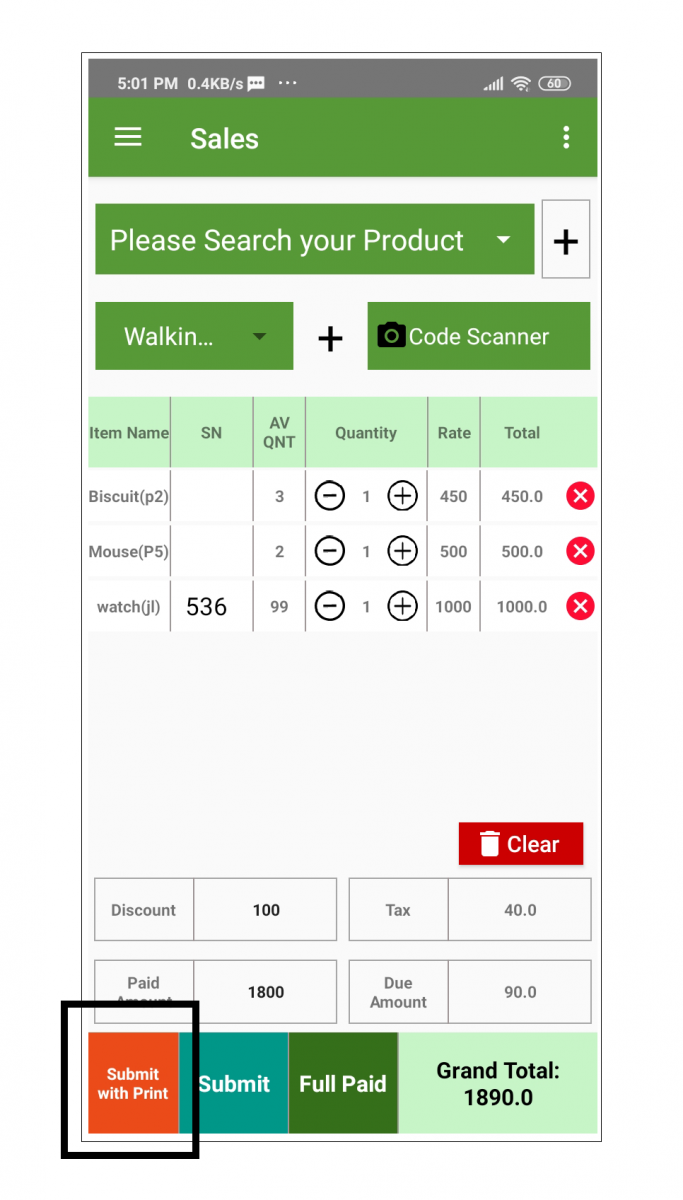
Start Sale
Here you can search or select your products by clicking the “+” button. Customer selection, discount, tax, everything on a single page. To print POS invoice just click the “Submit with print” button. Make sure your printer settings before you print.

Manage Sale
Invoice list
Here you can see all the invoices with the customer's name and date. In the search bar, you can search by Customer name, Invoice number, Mobile number. There is also an option to search date wise.

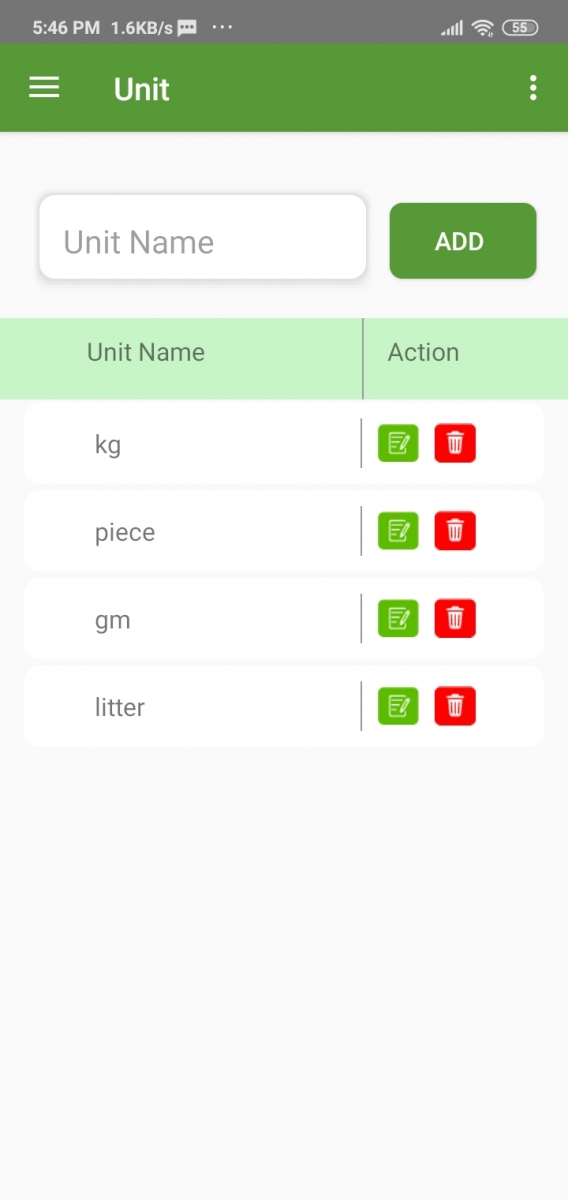
Add Unit
You can Add, Update and Delete Units from this page. Just write the unit name and hit add, to add a new unit.
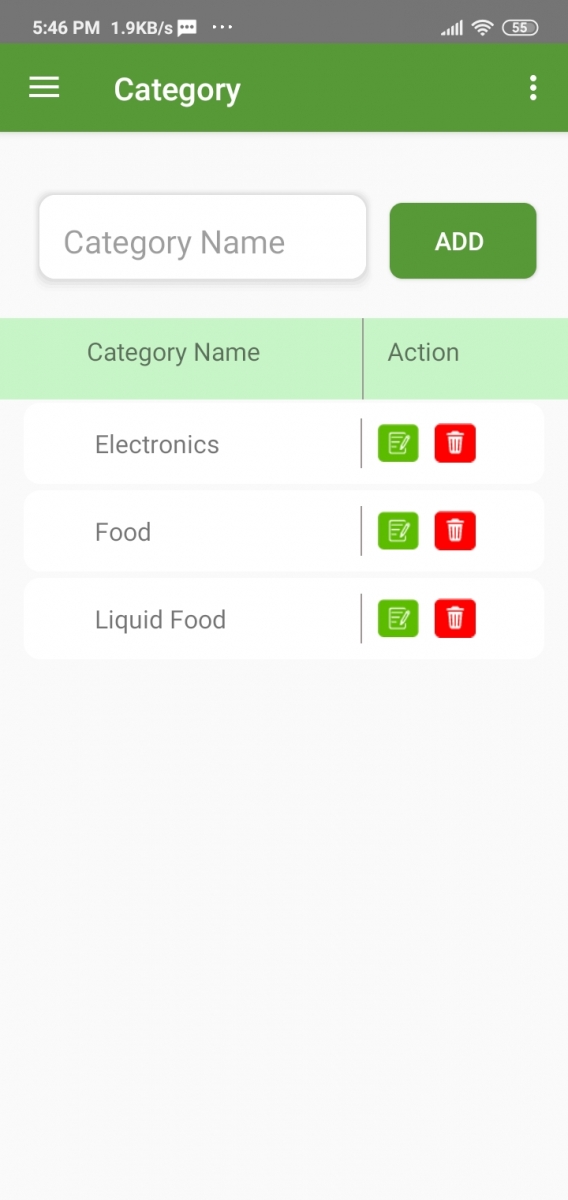
Add Category
You can Add, Update and Delete a category from this page. Just write the category name and hit add, to add a new category.
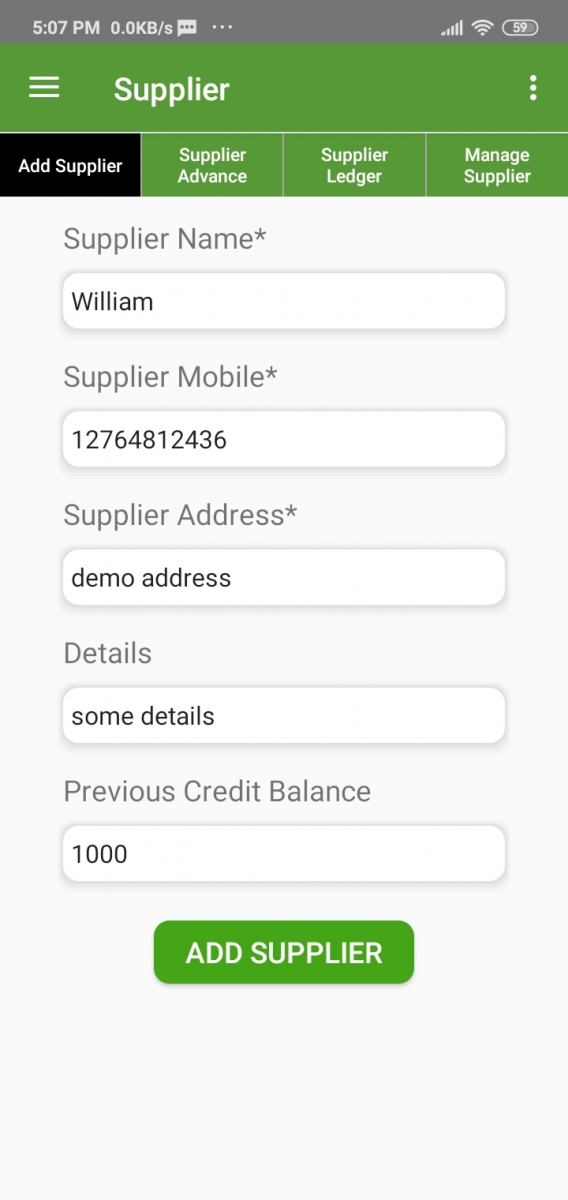
Add Supplier
Supplier > Add Supplier
You can add a new supplier from this page.
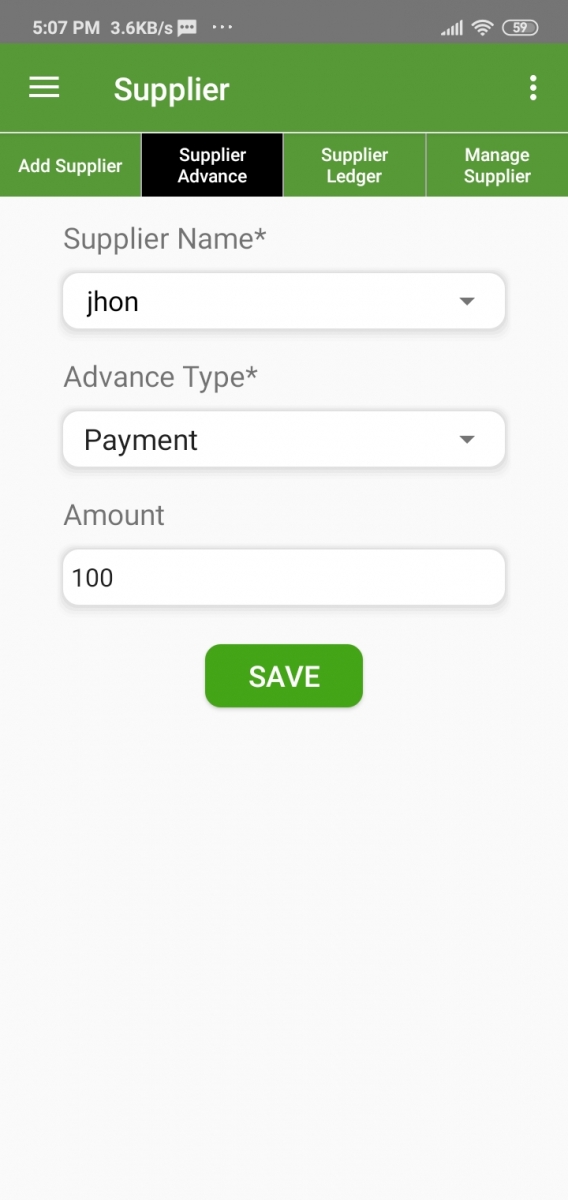
Supplier Advance
Supplier> Supplier Advance
There is an option in this app, to make payment to a supplier. Just select Supplier, payment type, and Amount and click on the Save button.
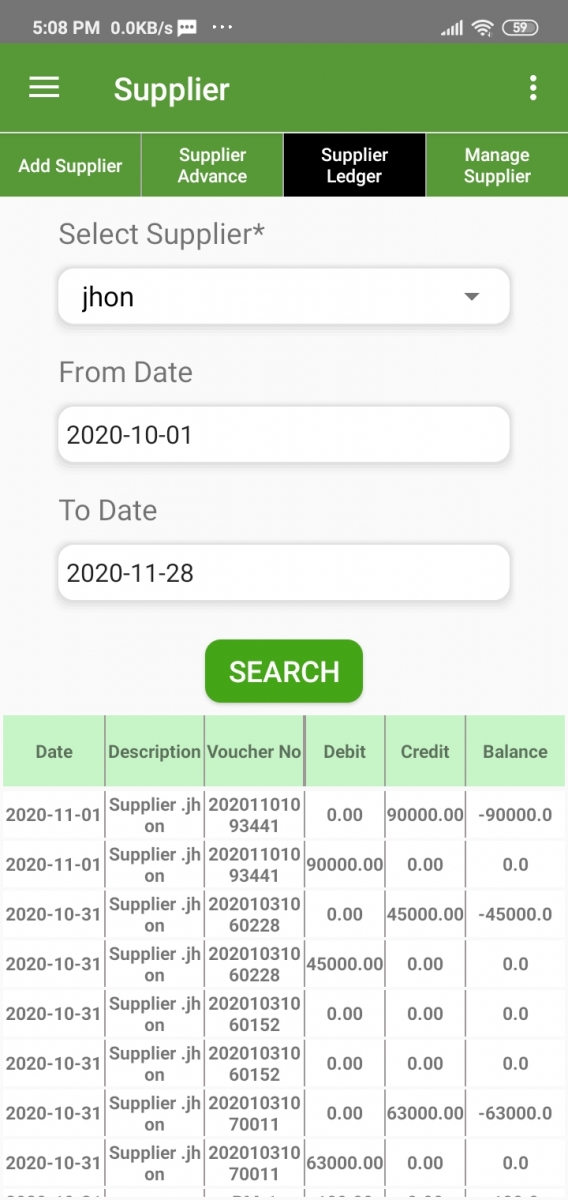
Supplier Ledger
Supplier > Supplier Ledger
Here you can check all the transactions of each Supplier date-wise. Just Select the Supplier and a date range hit the search button.
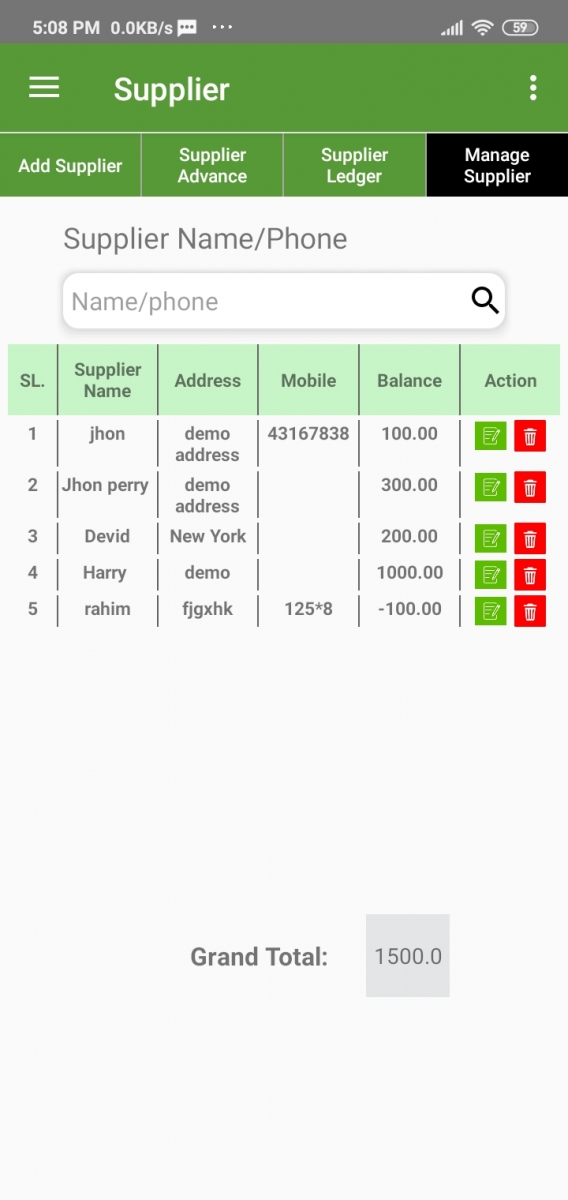
Manage Supplier
Supplier>Supplier page
Here you will get all the suppliers with details. by searching their Name/phone. You can Update and Delete your list.
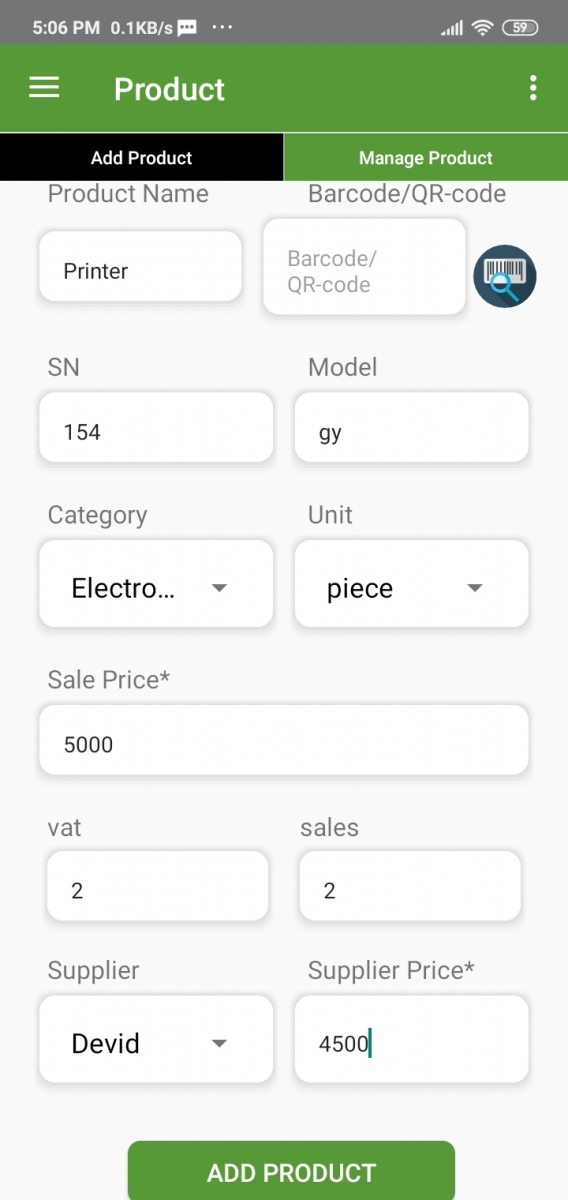
Add Product
Product > Add product
You can add products from this page. Insert all the required data. And hit the “Add Product” button. You can also add a bar code by clicking the barcode button.
Manage Product
Product> Manage product
You will find the product list with details on this page. The product edit and delete option also on this page.

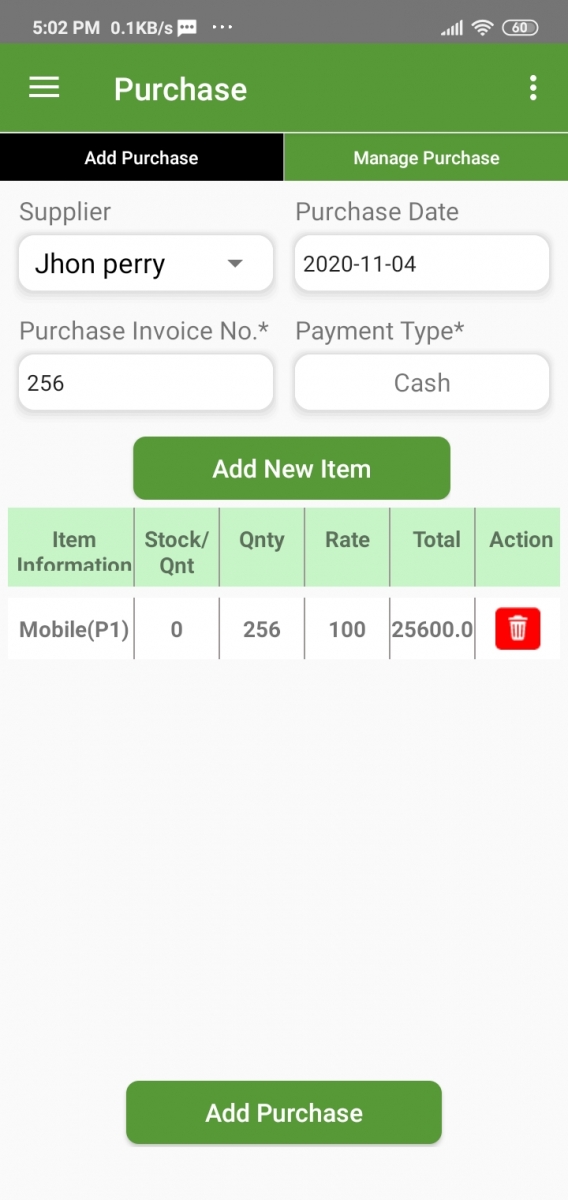
Add Purchase
Purchase> Add Purchase
You can add a new purchase from this page. Just select a supplier, insert the purchase invoice number and date. After that click on the “Add new item” button. A pop up will show. Select your product and quantity (price will show automatically), then hit add. You can add as many as the product you want. Finally, click Add Purchase.
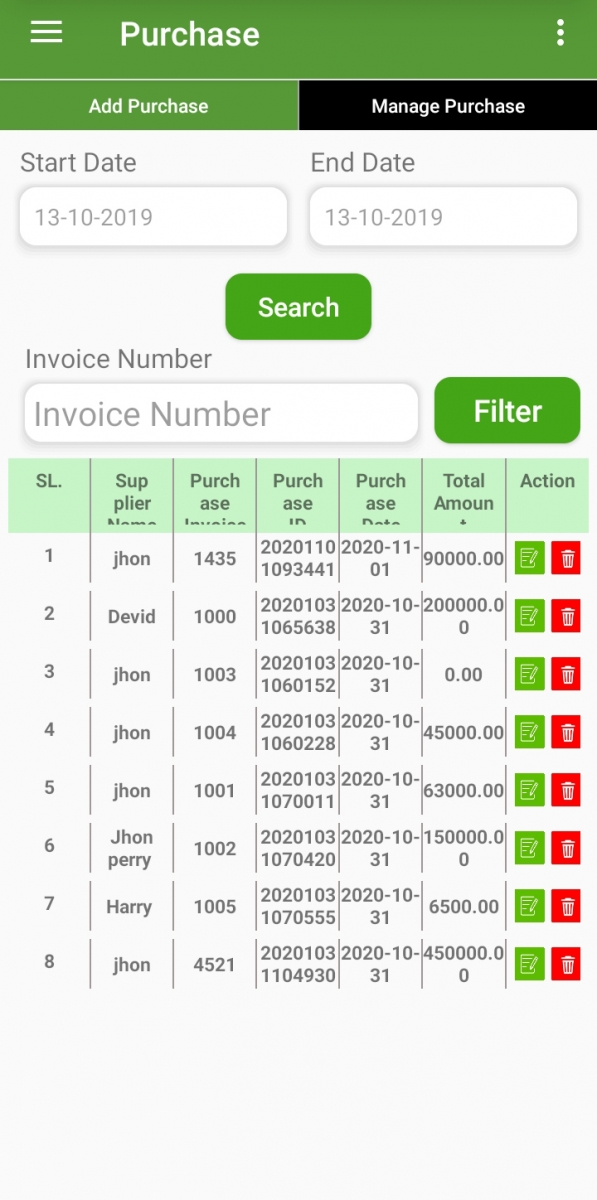
Manage Purchase
Purchase >Manage purchase
You will find the purchase list with details on this page. The purchase edits and deletes option also on this page. You can also filter your purchase record by invoice number and date.
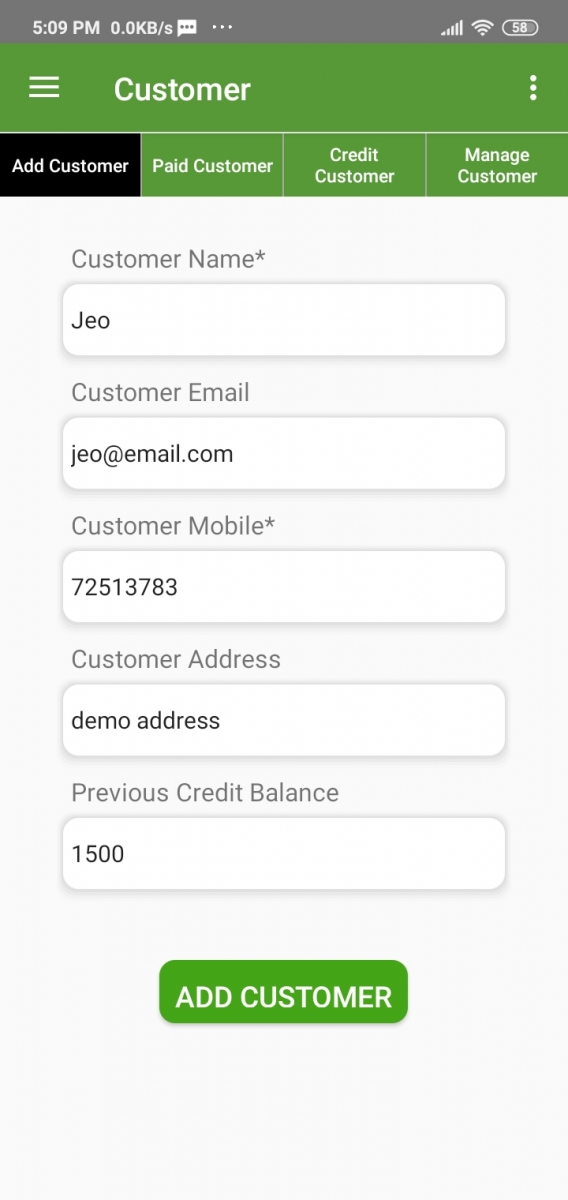
Add Customer
Customer> Add customer
On this page, you can add a new customer.
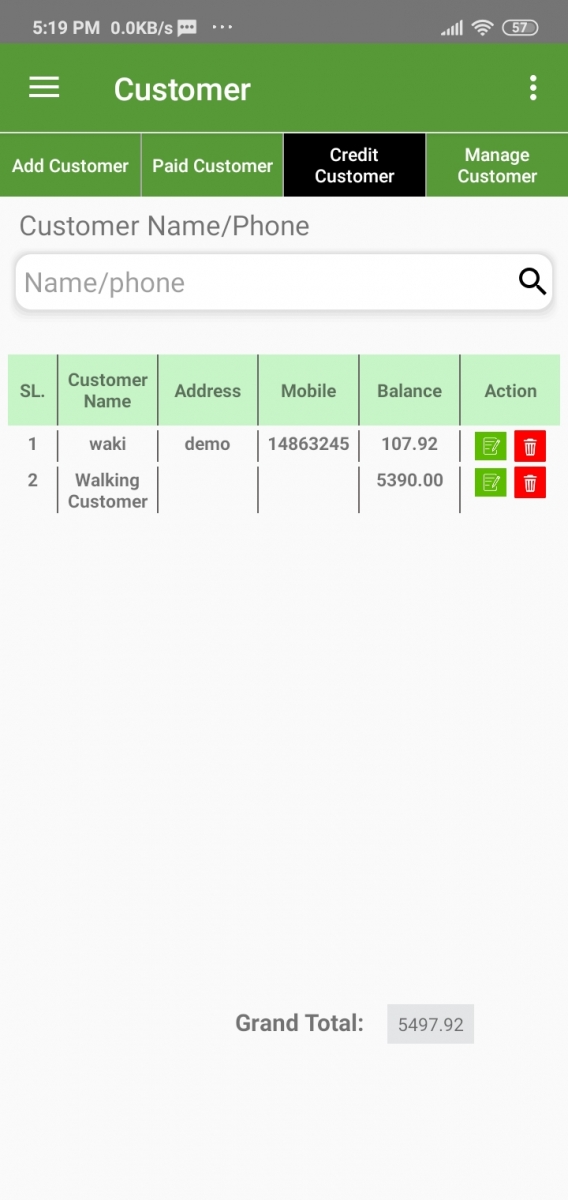
Credit Customer
Customer> Credit Customer
Here you can see the customers who have due. Also, you can search by Name/Phone.
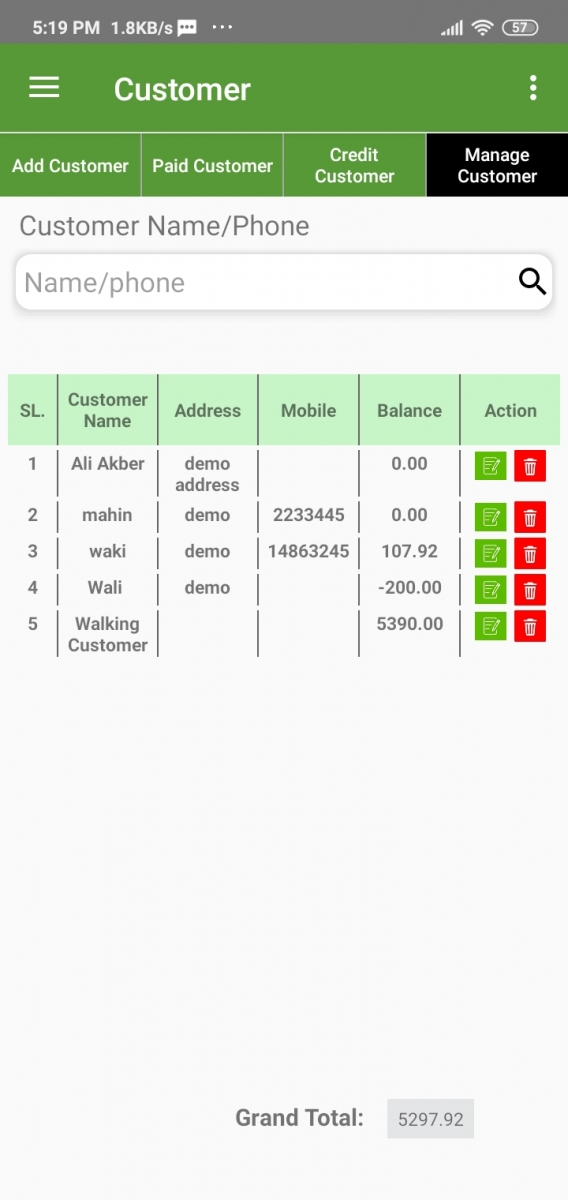
Manage Customer
Customer> Manage Customer
On this page, you will find all the customers with their details. You can also search your customers by Name/Phone.
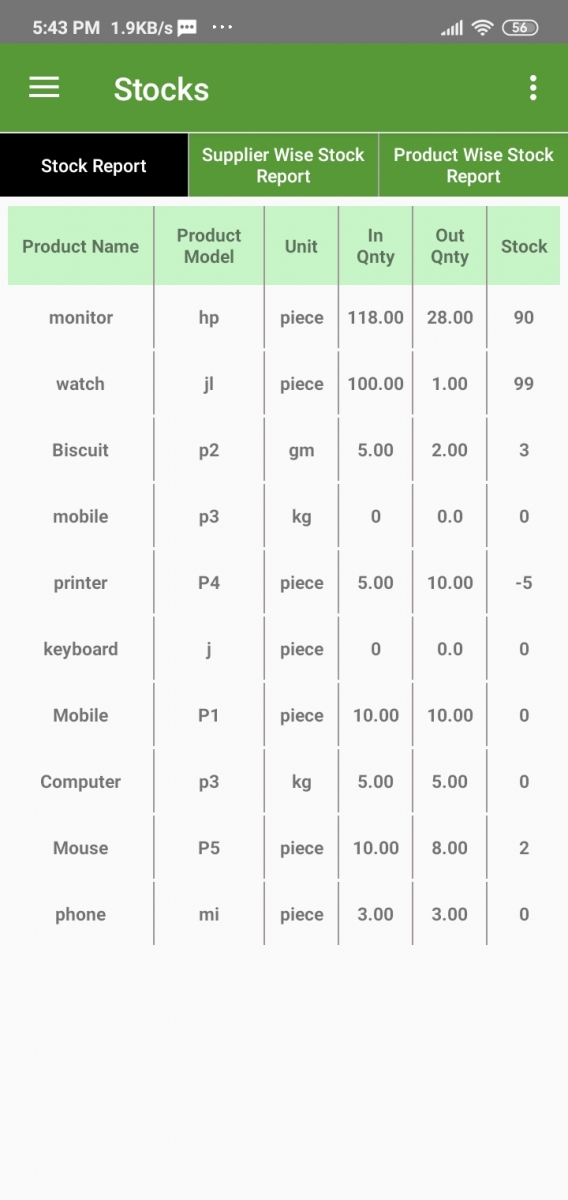
Stocks Report
Stocks >Stocks Report
Here is all the product list with In Quantity, Out of Quantity, and a number of present stock.
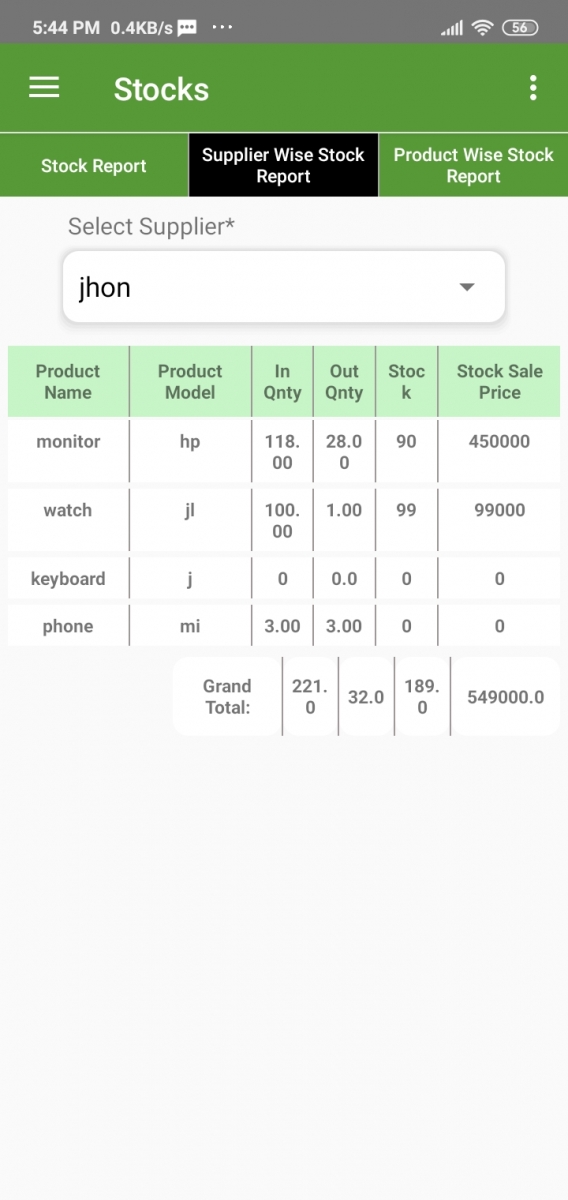
Supplier Wise Stock Report
Stocks > Supplier Wise Stock Report
You can get the stock report with the supplier filter on this page.
Product Wise Stock Report
Stocks>Product wise Stock Report
You will find the stock report individually on this page.
Reports Sales Report (product wise)
Reports >Sales Report (product wise)
Here you can see all the sales report product-wise. Just select the product and set a date range. Then click the search button.

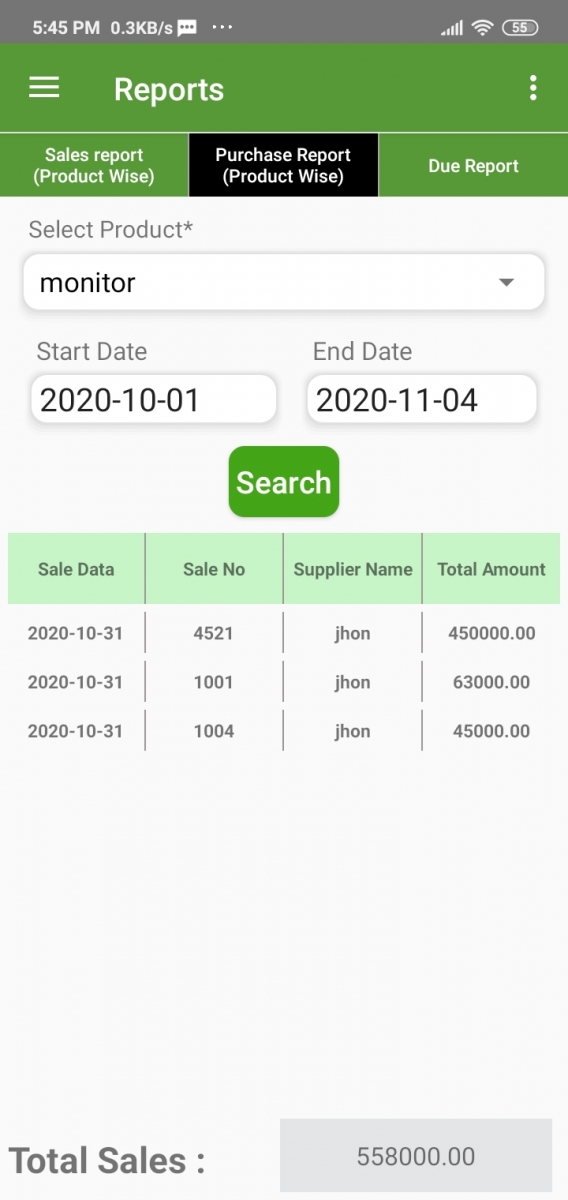
Purchase Report (product wise)
Reports> Purchase Report(product wise)
On this page, you will get the purchase report product-wise. Just select a product and date range. Click search.
.jpg)
Due Report
Reports > Due Report
Here you will find the Due report of customers. There is also a date filter on this page.

Accounts (Supplier Payment)
Accounts > Supplier Payment
On this page, you can Add Supplier Payment. Just click on the “Add Supplier Payment” button.
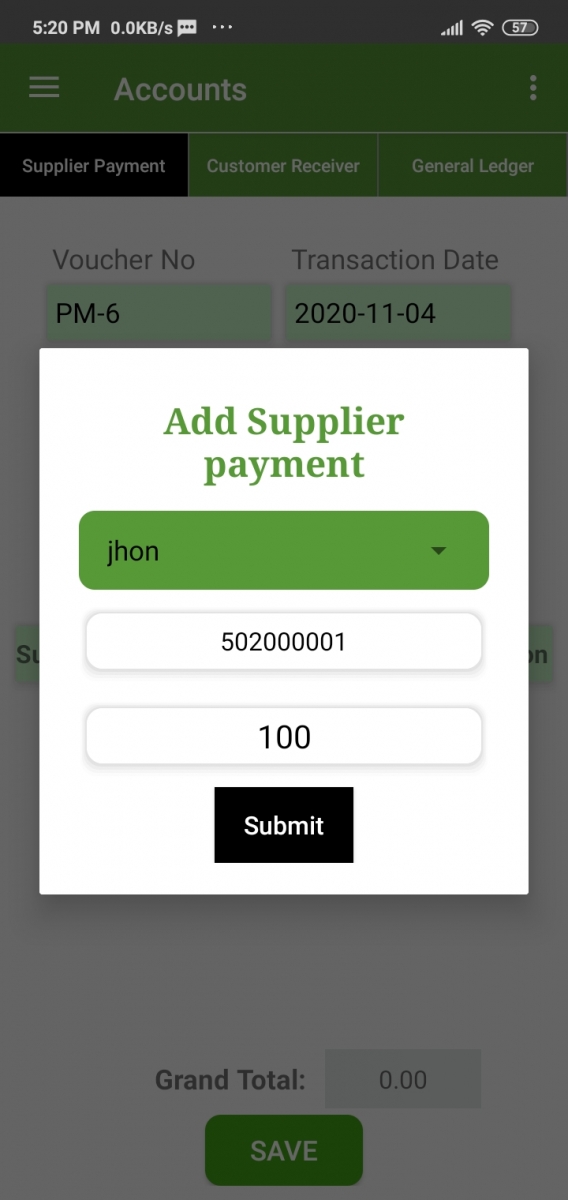
Supplier Payment
Supplier>Supplier ledger
You can add supplier payment records from this page, then select the supplier and insert the amount. Then click on submit. Finally hit the save button.
.jpg)
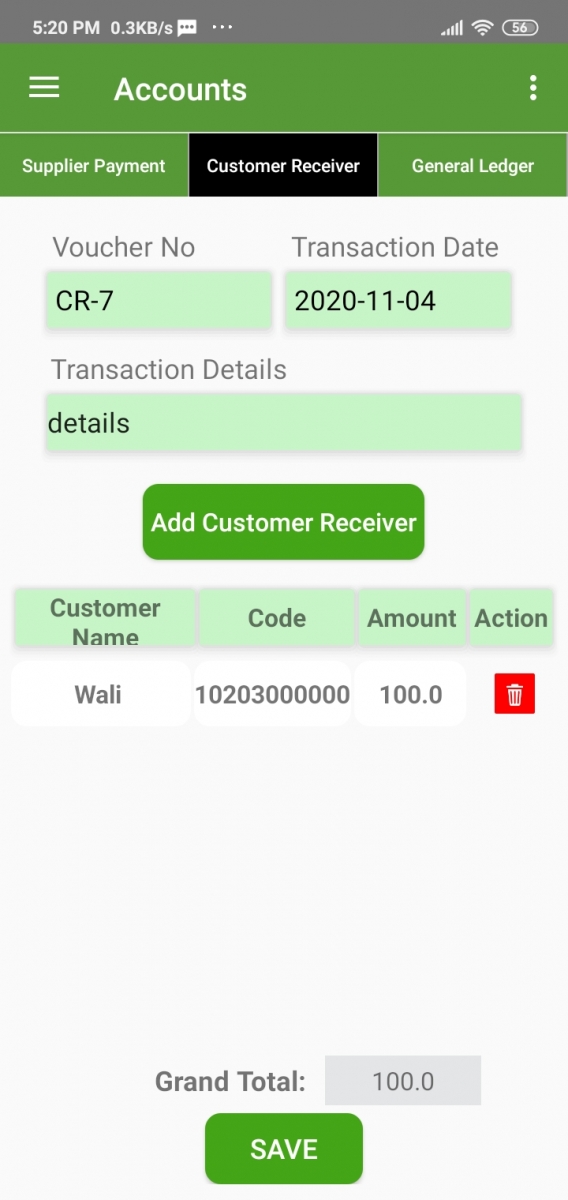
Customer Receiver
Accounts > Customer Receiver
You can Add customer payment in this App. To add customer Payment just click on the “Add customer Receive” button. Then select customer, insert amount, and hit submit. Finally, click on the Save button.
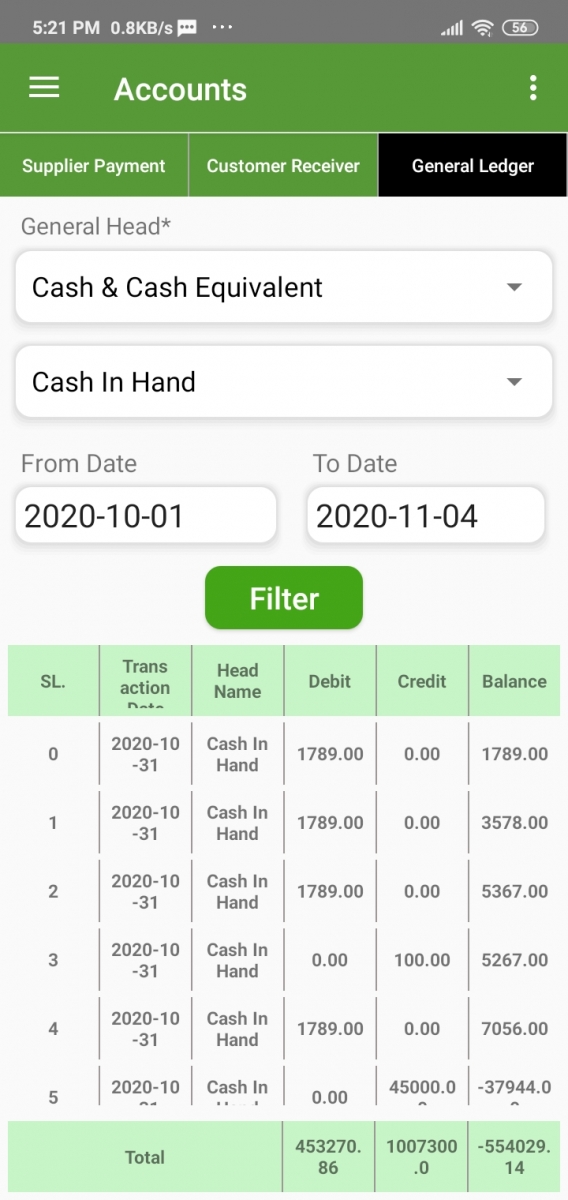
General Ledger
Accounts> General Ledger
You will get all the accounts head information on this page. Just select the general head, subhead, and date range. Finally, click on the filter.
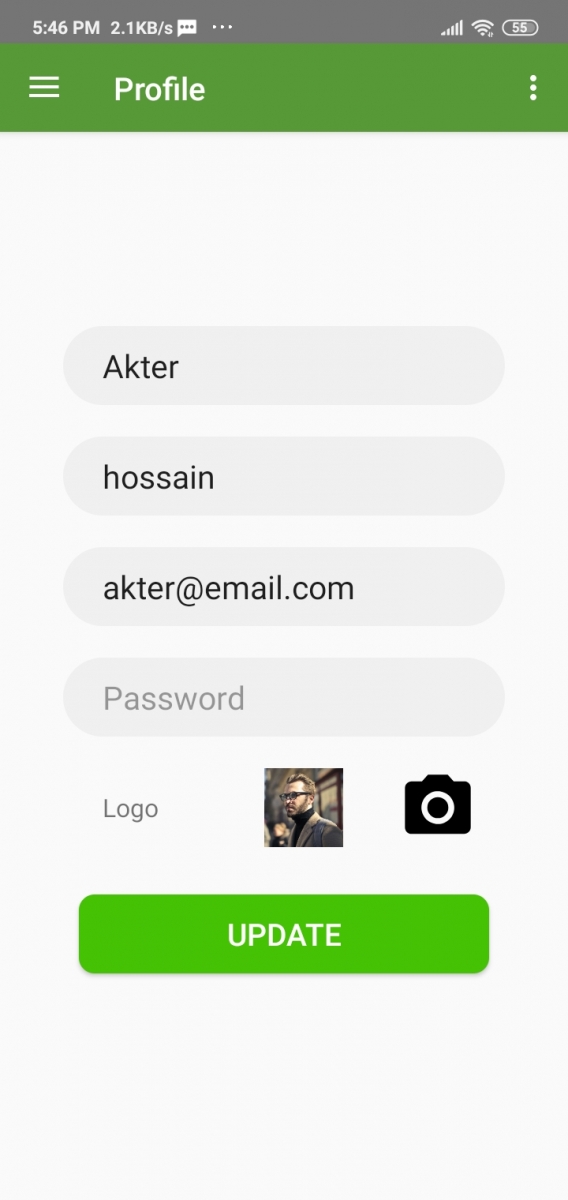
Profile Update
Here you can change your Fast name, Last name, and Email. The image can be changed from this page.
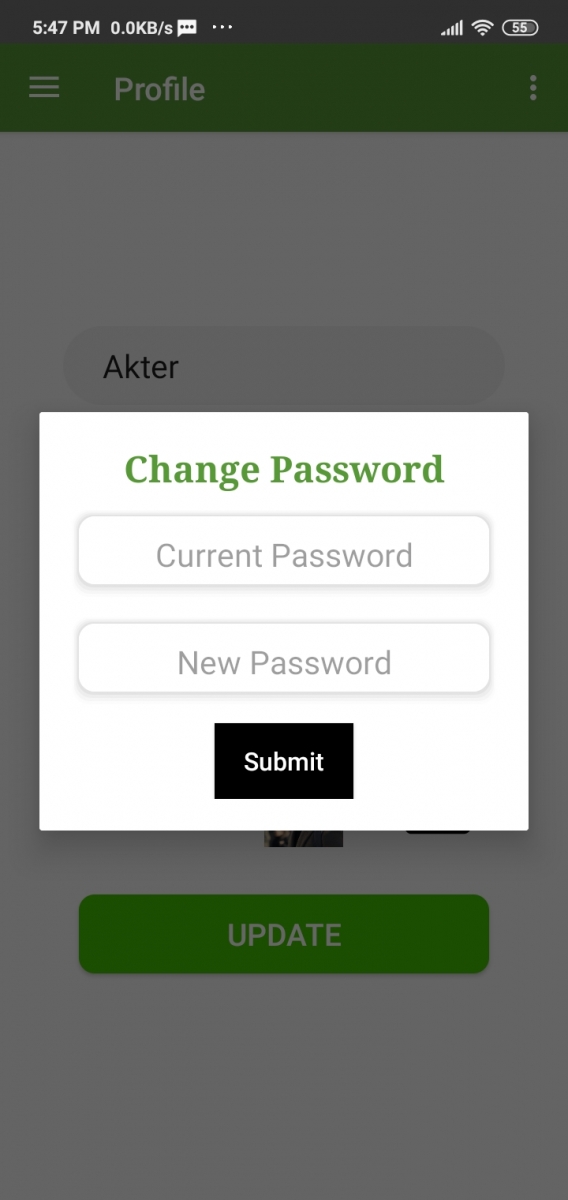
Change Password
From this page, you can change your password.
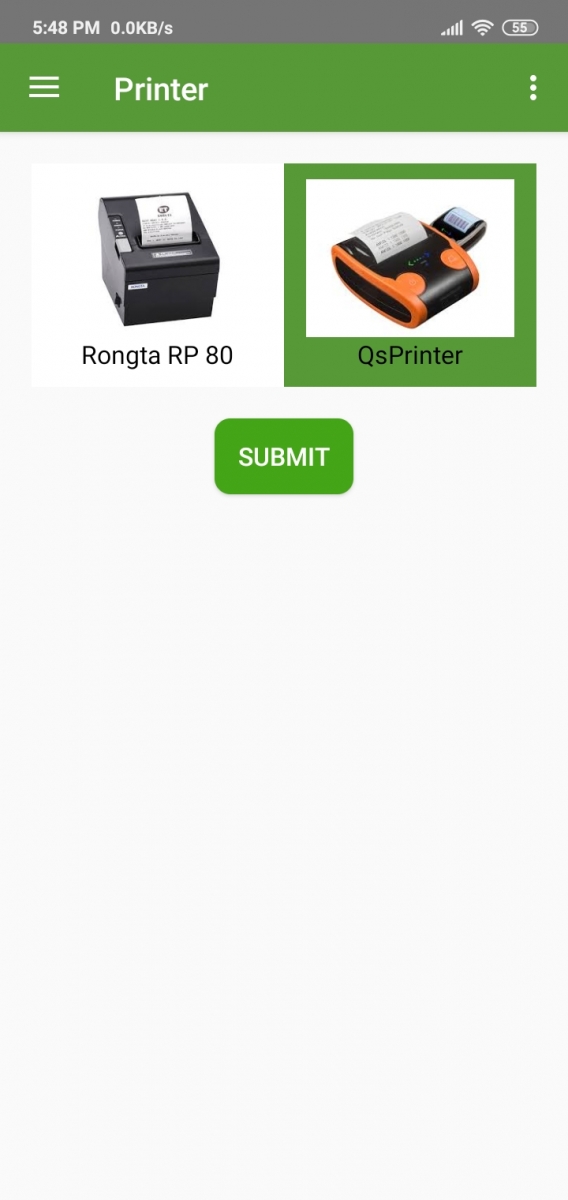
Printer Setting
There are 2 types of printer settings available in this App.
- 58mm
- 80mm
You can choose a printer from the printer setting page.
Note: The printer much have the Bluetooth Connectivity
After select a printer from the Printer page. You are ready to print the POS Invoice.
- Now turn on your Bluetooth printer.
- then go to the sale page. Now select some product and customer, click “Submit with Print”.
- Turn on your phone's Bluetooth, after that it should show all the available Bluetooth devices around your phone. Your printer should be on the list.
- Now select your printer from this list. If your printer is not on the list. Restart your print or phone Bluetooth.
- After selection, it will redirect to the sale page. Now click the “Submit with print” button. If everything okay then your printer should print the invoice.
- You have to do this process only for the first time. After that, you can print, just clicking the “submit with print” button.
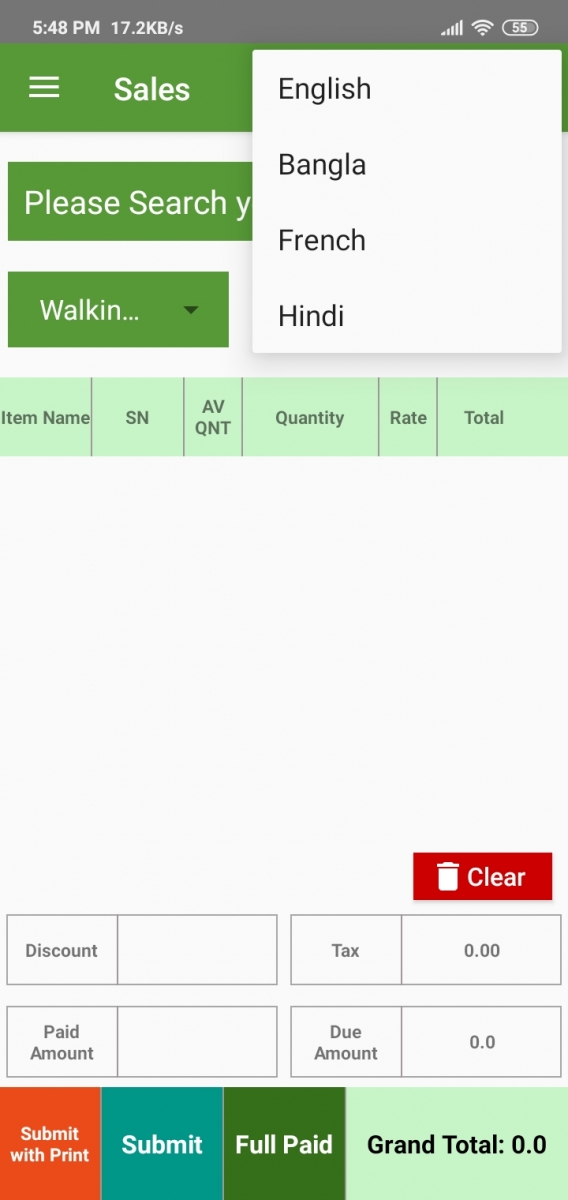
Language
You can change your Language from every page. Just click on 3 dots on the right side.

Contents
- Prerequisite
- How to download
- Setup: Connect Your App
- Login to Your App
- Start Sale
- Manage Sale
- Add Unit
- Add Category
- Add Supplier
- Supplier Advance
- Supplier Ledger
- Manage Supplier
- Add Product
- Manage Product
- Add Purchase
- Manage Purchase
- Add Customer
- Credit Customer
- Manage Customer
- Stocks Report
- Supplier Wise Stock Report
- Product Wise Stock Report
- Reports Sales Report (product wise)
- Purchase Report (product wise)
- Due Report
- Accounts (Supplier Payment)
- Supplier Payment
- Customer Receiver
- General Ledger
- Profile Update
- Change Password
- Printer Setting
- Language


Pay With


